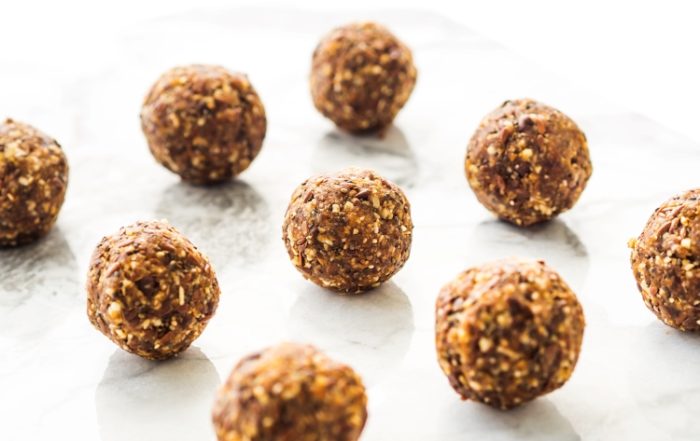
Chewy Gluten-Free Backpacking Granola Bars

When you are out on the trail, and in need of constant fueling, my light-weight gluten-free granola bars are just what you need to keep putting miles behind you.
These bars are high in all the nutrients you need, and none of the stuff that will slow you down. Even better, they hardly add to your overall pack weight and their size footprint in the pack is next to nothing. These can be made at home and modified to your own taste. Even better, they will preserve for longer backpacking treks making them one of my favorite choices.
The core ingredients I typically always use are oats, nuts, and natural binding and sweetening ingredients such a syrup or honey.
If I am going for more of a dessert result, I will add some dried fruits such as raisins or apples. Really the possibilities are endless, but the one thing that is constant is that these will keep you fueled no matter where the trails take you.
I would recommend playing with a few options at home before. This way you can perfect your perfect trail bar, and make sure you know what to expect when prepping these up for your next trek.
Here I’ll give you a top-level overview of how I usually will put together my bars. From there I encourage you to experiment yourself at home and find exactly what is going to fit your needs when you’re out on the trail.
The Core Ingredients in My Trail Bars
Oats – The base of most granola bars. For my specific recipe, I always use gluten free. However, for your recipe, feel free to use the oats you would use for anything else. Oats are great because they support your heart, release steady energy and are filled with fiber and antioxidants, which is essential for every hiker.
Nuts – Added crunch and flavor density. Here you can pretty much go wild. Your favorite nuts… add them in. Nuts contain fiber and protein, which will further support that caloric intake you need on the trail.
Seeds – Seeds will add some nuanced textures to your bars as well as some earthy flavor notes. Here you will find your healthy fats and seeds also support digestion.
Dried Fruits – These are great to add some sugars into the bar. They can also contain vitamins and minerals.
Sweets – To your taste, you may want to add some sweets into the bars. I typically don’t but common options could be chocolate chips or chunks, M&Ms and other crushed candy bars. These provide short energy bursts but be careful as you want to avoid any energy crashes on the trail.
Sugars – Essential for the overall structural integrity of the bars. This is what will be the binder of your bars. Common options here are maple syrup or a honey brown sugar mix.
Obviously for each ingredient listed above, there are various substitutes to meet your specific dietary requirements or flavor palette. Feel free to experiment and really make these your own.
Mixing Up the Bars
This is the simple part. Here you will simply be mixing the ingredients together. Start by combining all dry ingredients into a mixing bowl and toss them around until well mixed. From here you will want to add your sugars (honey, syrups…). From here combine both sets and mix thoroughly. Next you will pour the mixture into a square baking pan. Make sure it spreads evenly. Now it’s time to bake. Toss the sheet into the over at 345f for about 20 minutes. Remove and allow it to cool. For the best results, a freezer or fridge if possible. This will cool the bar quicker and lock the form. After the bars are cool and set, you can slice into any shape to get your desired portion size.
For bars that last longer, there are other options, but we’ll save that for another time.
From here, you are ready to toss the bars into your pack and enjoy them on the trail. I have had these last up to 7 days.